BC3203
Working with github
All of the assignments and tutorials for this subject are managed through git and github. Both tools are widely used by bioinformaticians and learning to use them is an important aspect of this subject.
For your first assignment there is a fairly complex setup process required (steps 1-3 below). Fortunately you will only need to do this once.
1. Sign up for a free github account
To gain access to assignment/tutorial templates, and to submit assignments and tutorials you will need to sign up for a github account.
During the sign up process you will be asked to provide your email address. Please use your JCU student email address. You can choose any username you like.
After verifying your email address with github you will be able to accept assignment and tutorial invitations. Your assignments will be private and visible only to you and the subject instructors.
2. Generate an SSH key
Open a Terminal window in RStudio ( Tools -> Terminal -> New Terminal )
Within your terminal window type the following command.
ssh-keygen
It will ask for a passphrase. Just hit enter without entering a passphrase (ie leave it blank). It’s OK this is still very secure and will keep things simple.
Accept all the other defaults simply by hitting the enter key multiple times. If everything succeeds you should see a message like this
The key's randomart image is:
+---[RSA 2048]----+
|oo+=oo. *.       |
| o +Oo.= +       |
|  o=o++ o        |
|  ooo. . .       |
|   o..  S .      |
|    o +o o .     |
| . . *... E      |
|  o =o*.   .     |
|   ++*..         |
+----[SHA256]-----+
Now that you have an ssh key you will need to access the public part of this key for the next step. Enter the following command in your terminal window
cat .ssh/id_rsa.pub
Copy the entire text starting from ssh-rsa . You will need this in the next step.
3. Add your ssh public key to your github account
By providing your public key to github you can prove that you are who you say you are. Note that this relies on the fact that you have access to both the public key and it’s corresponding private key. You can share the public component with anyone but only you should have access to the private key. Github will use your public key to generate a challenge code that only someone with the corresponding private key could decode (this is you). Use the following steps to add your public key to github.
- Login to your github account
- Click the profile icon in the top left corner and then select “Settings” from the menu
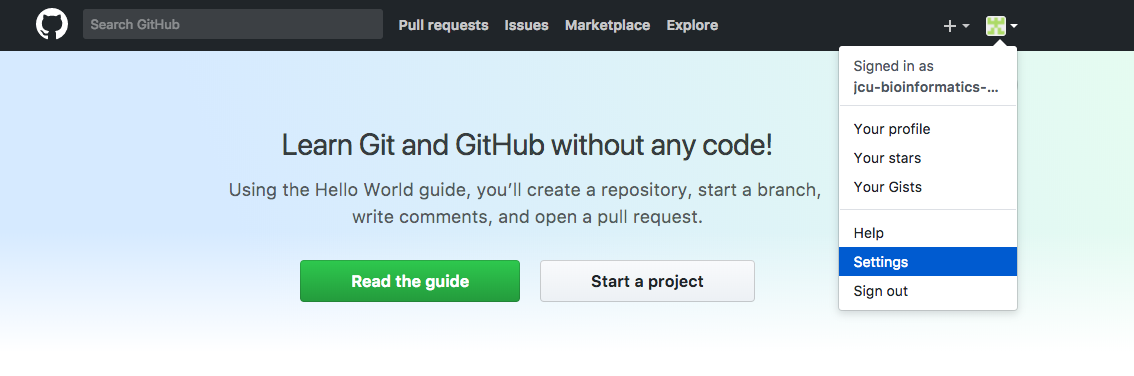
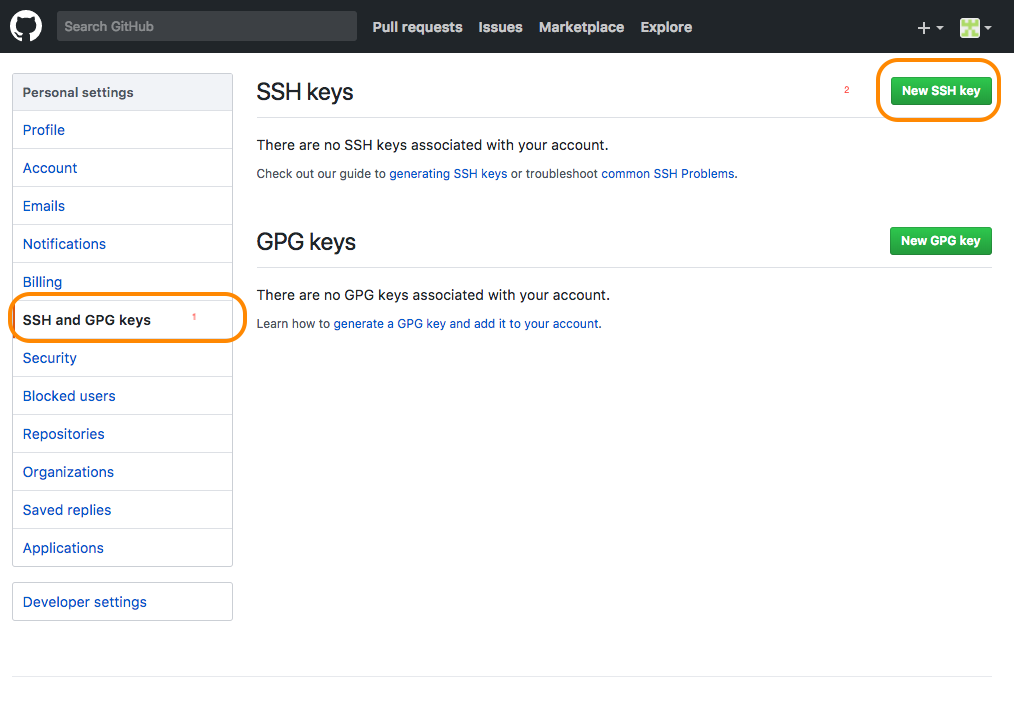
- Select “SSH and GPG Keys”. Then click the “New SSH key” button
-
Copy your entire public key
-
Paste the entire key into the “Key” field on github.
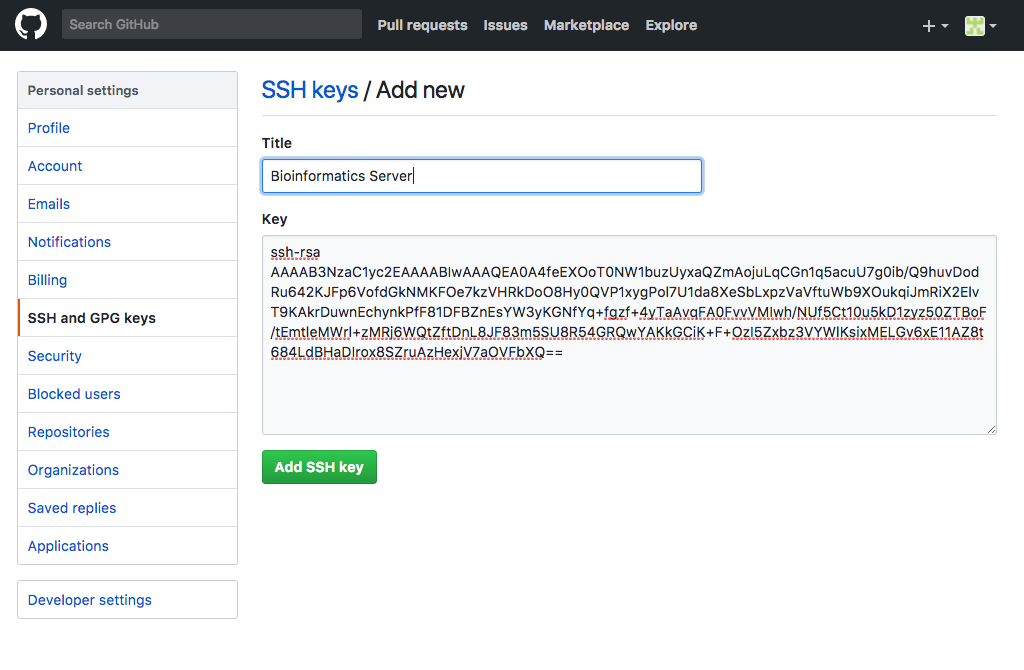
- Finally click “Add SSH key”
4. Accept a tutorial or assignment invitation
As the subject progresses you will be given assignment and tutorial invitation links.
These are available on LearnJCU and on the subject website https://bc3203.bioinformatics.guide
To accept an assignment or tutorial click the link (or paste it into a web browser). You should see a page asking you to confirm acceptance of the assignment. Once you confirm acceptance, github will create a private copy of the assignment/tutorial template. This copy is called a repository and will have a name that is the union of the tutorial/assignment name and your username. For example metagenomics-iracooke would be the name of a repository where user iracooke would work on the metagenomics assignment.
5. Clone the repository
Now you are ready to create a working copy of the repository that you created in step 4.
-
Login to your RStudio cloud server (or open RStudio if you are doing things on your own computer).
-
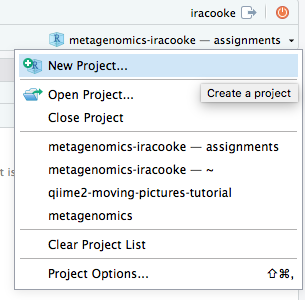
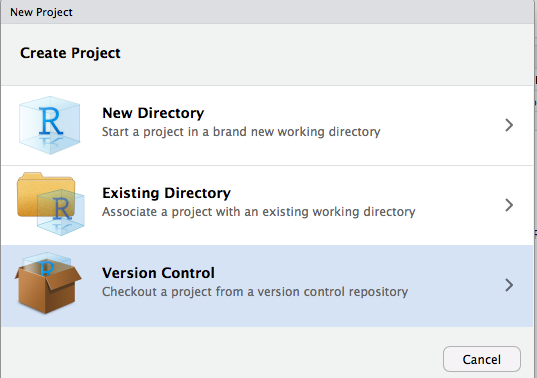
Select New Project from the project menu
- Choose “Version Control” as the new project type
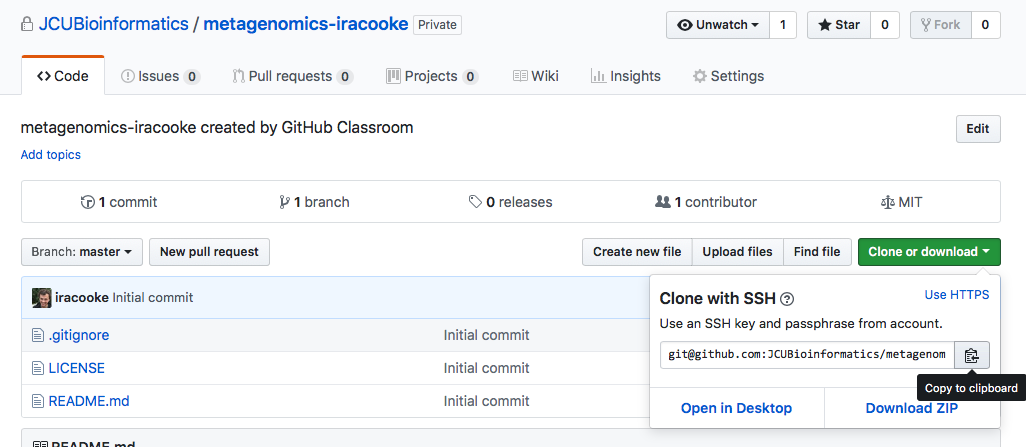
- Enter your repository URL and project directory details. You can easily find your repository URL by going to your repository page on github and clicking the “Clone or download” button.
Note: Make sure you obtain an ssh url. This will start with git rather than with http.
After entering your repository details they should look something like this

Note that in this example we have specified that the project should be created as a subdirectory of assignments. You can choose whatever directory you like for this.
Once you have entered all the details click “Create Project”. When you do this rstudio will attempt to download a copy of your repository from github. The first time this happens it might put up a window asking for your permission. If you see this type “yes” into the relevant window.
If you see a window asking for your password it probably means that you copied the https url from your repository instead of the ssh URL. For ease of working with github it is highly recommended to use the ssh URLs so you should probably cancel the process and start again if this happens.
Note: You must complete the sign up step before you can accept invitations
6. Submit your work
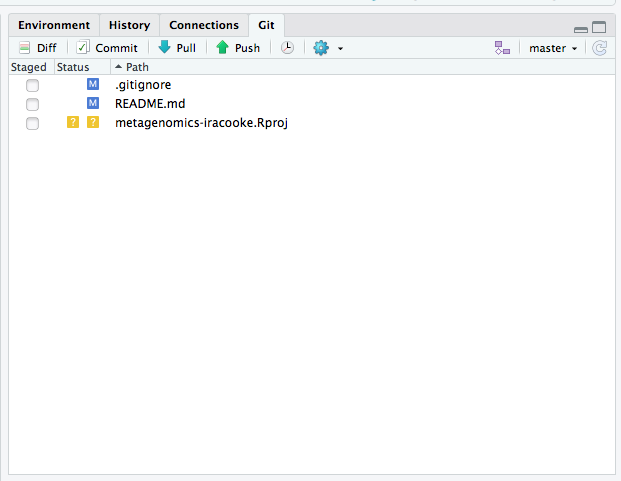
As you work on your assignment or tutorial you should regularly commit your changes to git and then push those changes to github. You can do all these things using the “git” menu in RStudio
Before you can make commits you will need to tell git who you are though. You do this from the Terminal by running the following commands
git config --global user.email "you@example.com"
git config --global user.name "Your Name"
Replace “you@example.com” with the email address you used to sign up to github (probably your jcu address). Replace “Your Name” with your full name.
VERY IMPORTANT Make sure you commit AND push all your latest changes to github prior to the due date for each tutorial and assignment. Instructors will collect assignments by cloning directly from your latest version on github and any edits that you have not pushed will not count towards your assessment.
7. Check your progress.
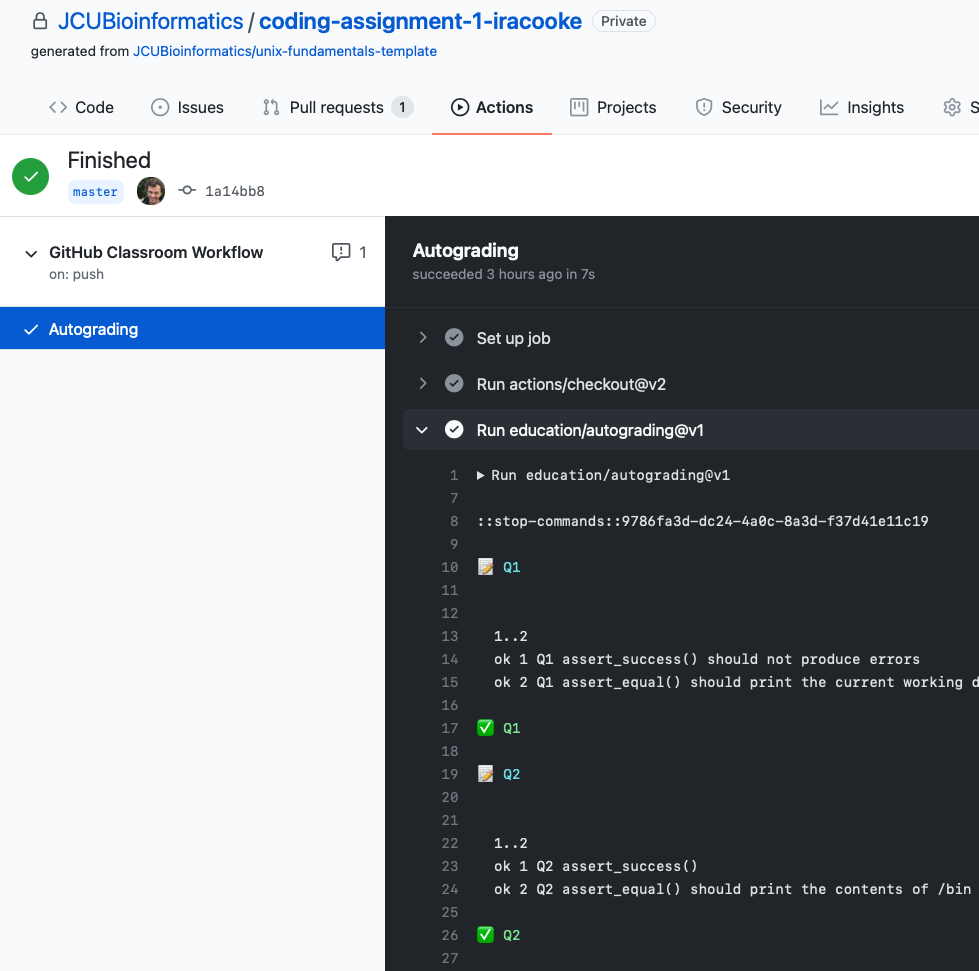
As you work through your assignment you will typically run blocks of test code to check whether your answers are correct. When you commit and push your code to github it will automatically run all of the checks. You can view the status of the checks on github. Click the “Actions” tab and then click to view results of the “education/autograding” step.
Beyond this subject
A portfolio of high quality software is a valuable asset when looking for a job. Github and other code hosting websites provide opportunities for you to build such a portfolio. For example if you develop something that others will find useful you should consider publishing it on github. If you are looking for something to work on, consider contributing to an open source project. If your contribution is accepted it will show up in your profile and demonstrate to potential employers that you have the ability to collaborate and produce high quality code.
Explore some of the freebies available as part of the github student pack. Most useful is the unlimited private repositories from github