BC3203
Goal
The primary goal of this tutorial is to get you familiar with the workflow that you will use for tutorials and assignments throughout this subject. A secondary goal is to learn some basic unix commands.
Preparation
This tutorial assumes that you have some basic knowledge of using the unix command line. Before you start you should therefore make sure that you have completed the interactive tutorial which covers the following concepts and commands;
- Structure of a unix command (command [options] arguments)
- How to use options to change behaviour of a command
- How to discover options for a command by looking at its
manpage - How files are organised in unix
- Absolute vs relative paths
- Commands to navigate the filesystem
ls,cd,pwd - Commands to make directories and files
mkdir,touch - Commands to move, copy and delete files
mv,cp,rm - Commands to view the contents of files
cat,head,tail,less - Counting characters and lines with the
wccommand - Pattern matching and filtering with the
grepcommand - Combining multiple commands together using the pipe
|operator - Redirecting output to a file with the operators
>and>>
If you do this before you start, it will make the actual tutorial questions easier so that you can focus on getting your RStudio, git and github workflow setup.
Useful Reference Material
- This printable “cheat sheet” with a summary of many common unix commands
Setup
The workflow for accessing, completing and submitting assignments in this subject is a little complex. Fortunately the steps will be very similar for all items of assessment so once you learn what to do it is not very difficult.
Starting from scratch the steps are;
- Open the class rstudio server in your web browser (Chrome, Safari or Firefox preferred) and follow the prompt to login. More info on this server is available here
- Get a free github account (if you haven’t already) and then follow the git and github guide to setup ssh access to github
- Accept the assignment on github classrooms by visiting this link and clicking the “Accept this assignment” button
- After accepting the assignment you should see a link to your personal version of the assignment code repository. It will have a url that looks like this
https://github.com/JCUBioinformatics/coding-assignment-1-unix-usernamewhereusernamewill be your github username. Click the link to open this repository’s page in github - Use the “Clone or Download” button to obtain an
sshurl to your repository. See the image below for what this looks like on github. You must make sure your url starts withgitnothttps. Copy this URL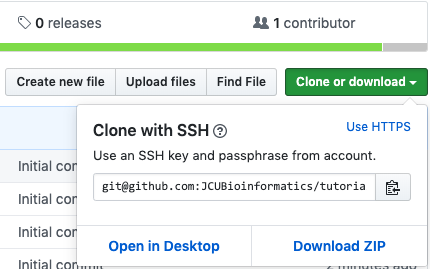
- Now return to rstudio and use the project menu in the top right to create a new project.
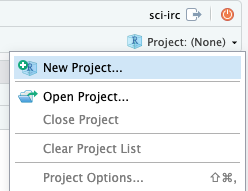
- After clicking “new Project” select “Version Control” as the project creation method. This is because you will create your new project by cloning the repository you just made on github.
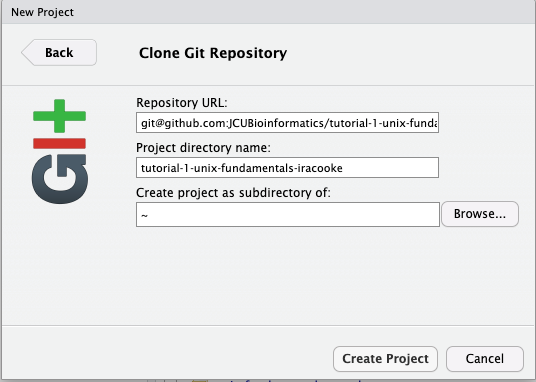
- In the next window select
Gitas the version control type - Paste the url from github into the window that appears. After pasting in your Repository URL the project directory name should auto-populate. Leave this at its default value and click “Create Project”
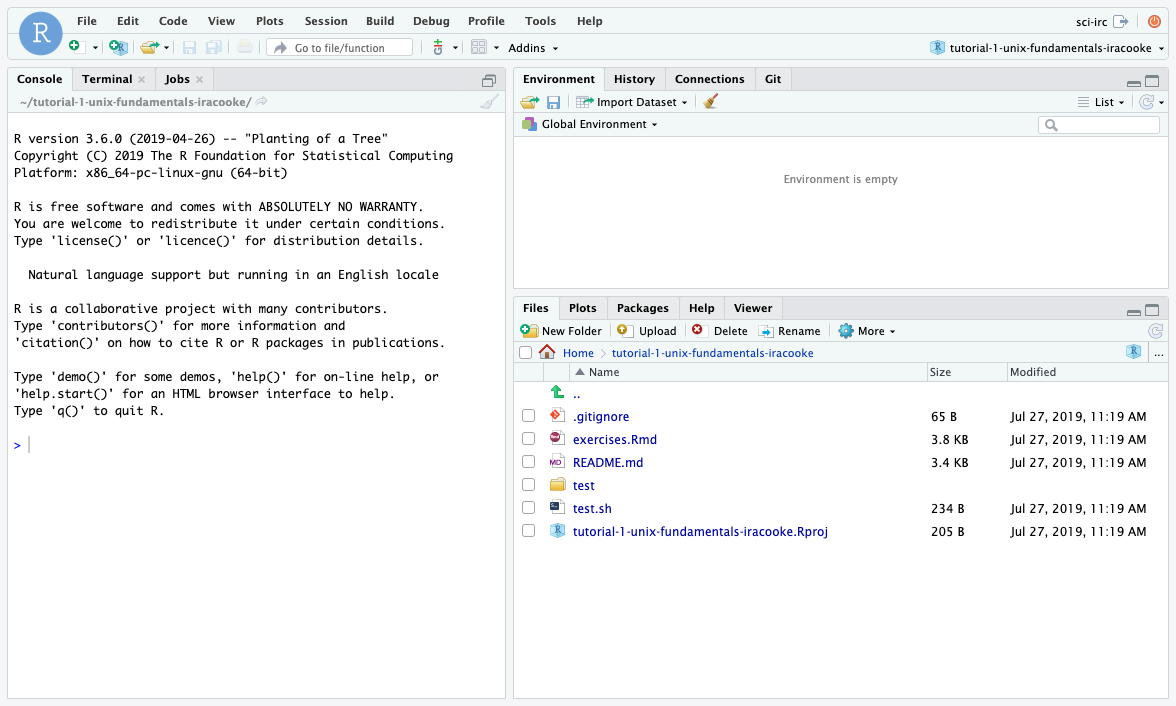
- After clicking “Create Project” in the last step you should see a text window come up reporting progress as it downloads your project from github and creates it. If everything is successful you should see files appear in your file browser and your rstudio window should look like below.
How to complete the assessment for this tutorial
Important: Before you start you will need to setup automated testing software so that the test code blocks in the exercises work properly. To do this run the script setup_bats.sh by entering the following commands in a Terminal window in RStudio;
cd
bash setup_bats.sh
You should only need to do this once for the entire subject.
After running the script above you should open the file containing tutorial exercises (called exercises.Rmd) in RStudio. Your answers to the coding questions in this file will form the assessment for this tutorial. Before you start answering questions though you will need to run one more setup script. This time you run the script from within exercises.Rmd. The process for every coding assignment will be the same
- After you have opened
exercises.Rmdclick the button above this file labelled “Knit”. This will prompt you to install a bunch of software. You should follow the prompts to complete this installation process. - Now that the software is installed you should be able to run the setup code by clicking the green triangle as shown;

After the setup is complete you should be ready to start the exercises but don’t start adding your answers straight away. Start by reading the guide (see section below). The guide is designed to provide you with background information that will be helpful when answering questions. It also contains prompts that will ask you to answer specific questions in the exercises when you are ready.
When you do start answering questions in exercises.Rmd you should do so as follows;
Edit the file by replacing your_answer_here with the answers to each of the exercises.
After each of the questions you will usually also find some test code that looks similar to this
bash test.sh ub01
After you have entered your answer code (and save the document) you can try running the test code by clicking the “Run current chunk” button (green triangle). If you entered the correct answer you will see the word “ok” beside each of the test assertions. If anything failed it will report as “not ok” and an error message will appear that attempts to explain what went wrong.
After you have completed all the exercises you should submit your work by committing your changes and then pushing your changes to github. To do this follow these steps;
- click on the “Git” tab in the top right part of RStudio.
- Click check boxes beside all the files that you want to commit to git. Usually this will mean just your
exercises.Rmdfile as well as any files with agithubor.githubprefix. The screenshot below shows a typical example for your first commit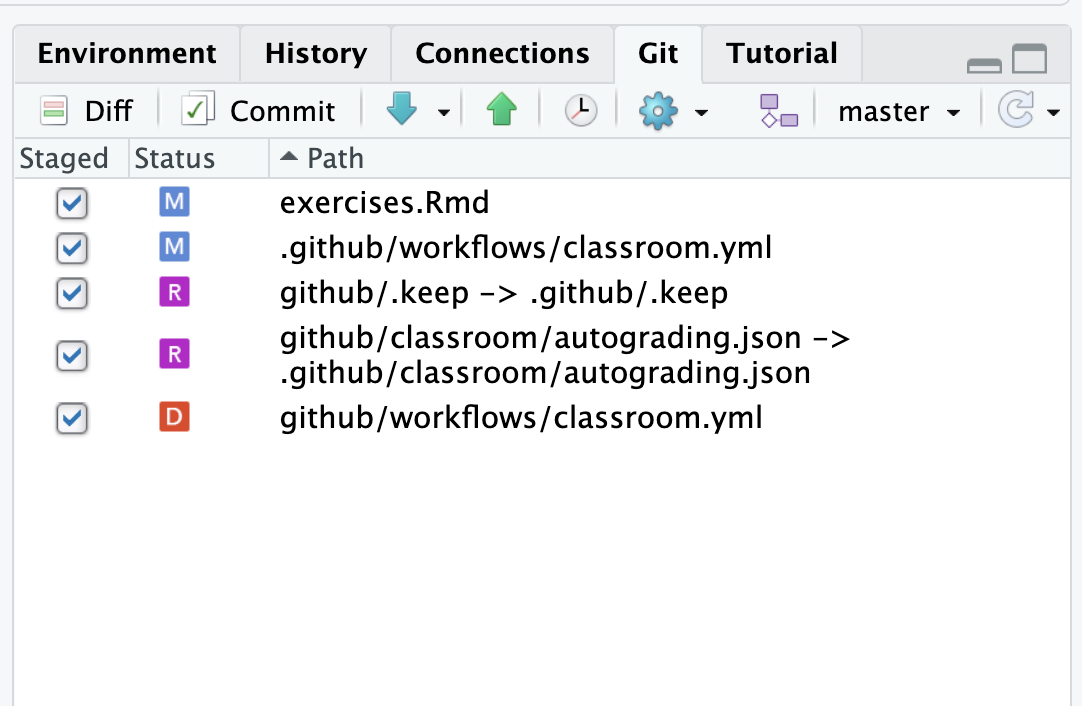
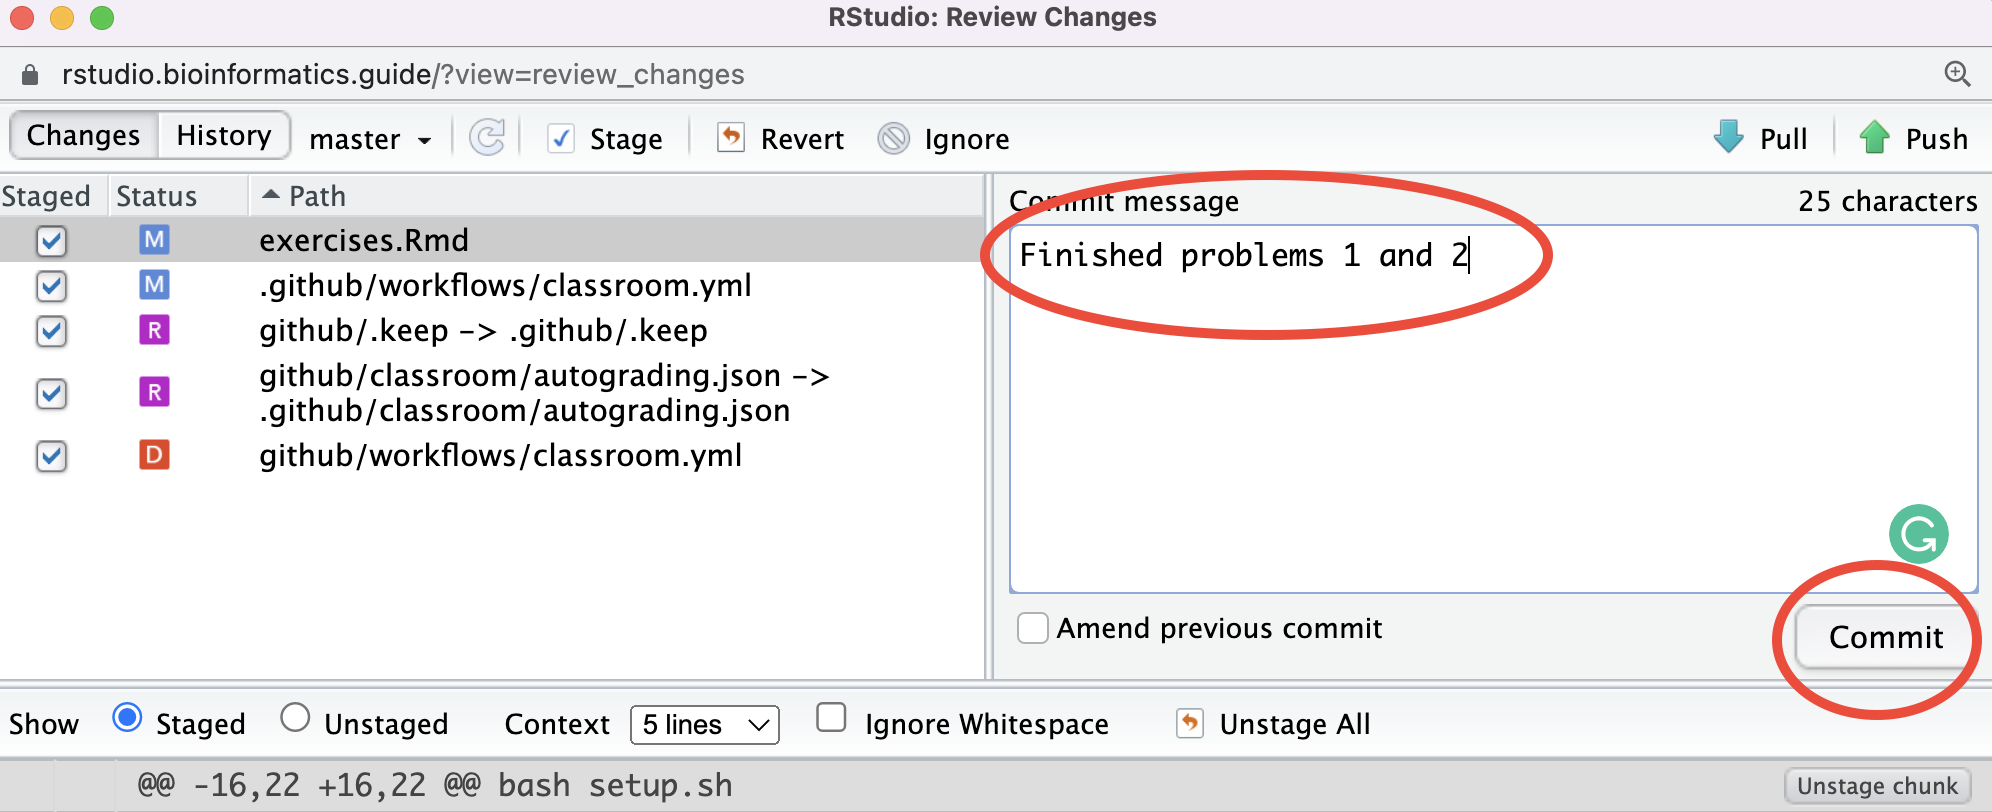
- Next you should click “Commit” which will bring up another window. Add a commit message like “Finished problems 1 and 2” in the appropriate box and then click “Commit”
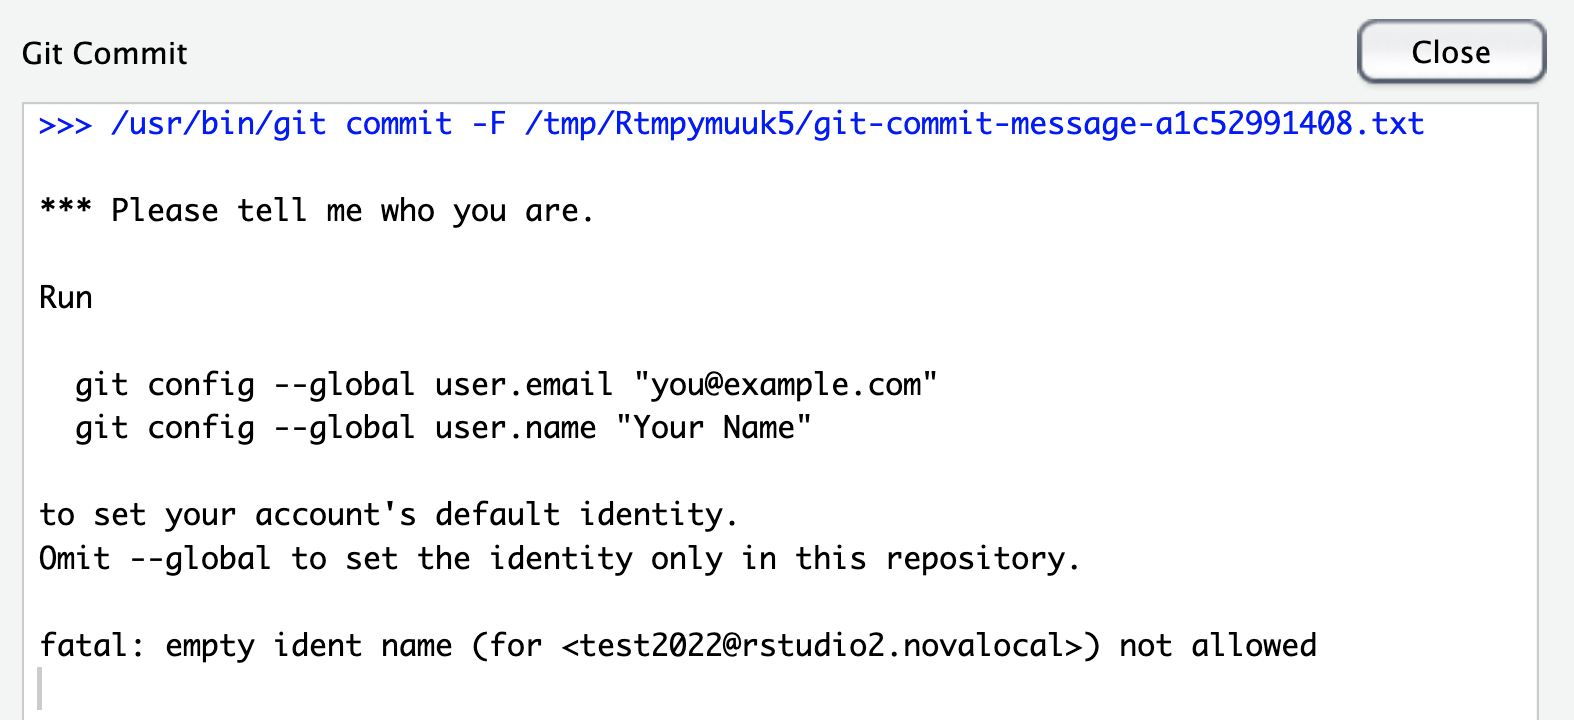
- When you click commit you might see an error like “Please tell me who you are”. This is because you need to follow some additional setup steps to set your username and email address as described here
- Provided you set your username and email address correctly you should see no errors when you commit.
- Finally AND THIS IS VERY IMPORTANT. You must also click “Push” to send your commit to github.
- Feel free to commit and push your assignment as many times as you like up until the deadline. Once the deadline has passed your mark will recorded based on test results from code that you have PUSHED to github. If you don’t push your code you will receive a mark of 0.
Guide
Entering UNIX commands in RStudio
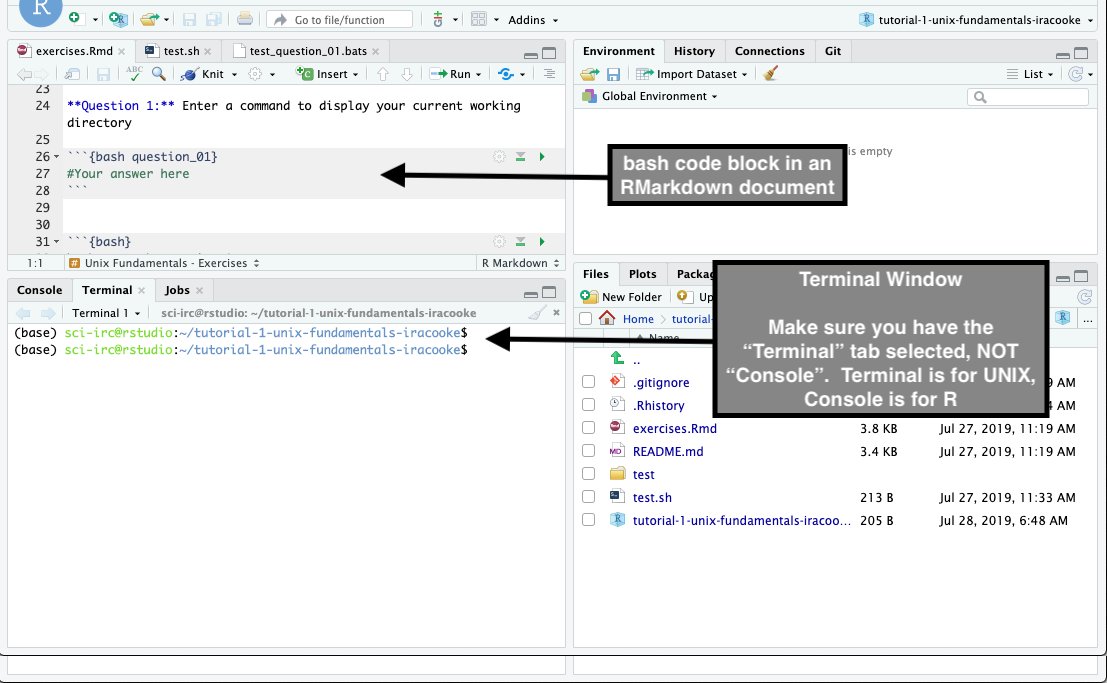
There are two places where you can enter unix commands in RStudio. The most direct way is via the Terminal window where you can simply type commands at the prompt. The other way is via an RMarkdown document (like exercises.Rmd) where you enter unix commands enclosed in a bash code block (See image below). In this subject you will generally use the Terminal to quickly practise commands and you will use code blocks in RMarkdown to enter answers to exercises.
There are some important differences between the way commands behave in Terminal and in RMarkdown code blocks. The most important difference is that each time a command runs in RMarkdown it creates a new unix shell. This means that things like shell variables (next week) and your current working directory will not be remembered between code blocks. In Terminal your commands are run in a persistent shell. So for example if you change directory is stays changed until you change it back. We will explore this a little below.
Summary of UNIX Commands
In this tutorial we will use the following commands
| Command | What it does | Usage |
|---|---|---|
ls |
List files | ls path to list files at path |
cd |
Change directory | cd path to change to the directory at path |
pwd |
Print working directory | |
mkdir |
Create a directory | mkdir path Create directory at path. The directory should not exist |
which |
Locate a program file | which program shows where the executable file for program is located |
fortune |
Print random phrases | |
cp |
Copy files | cp from to to copy the file at from to a new file at to |
cat |
Show the entire contents of a file | cat file |
head |
Show only the top few lines of a file | head file |
wc |
Count words, characters and lines in a file | wc file perform count for file |
cowsay |
Print ASCII art | cowsay STDIN converts text from standard input to ascii art |
We will also learn the following key unix concepts
- How to send output from a command to a file with the redirection operators,
>and>> - How to send output from one command to become input for another with the (pipe) operator
|
Navigating the filesystem
Try the following commands in the terminal (not in RMarkdown. You will want a persistent shell for these)
Run the pwd command to show your current working directory
pwd
If you just started a new Terminal window this should be your home directory. It will look something like this
/home/jcXXXXX
This is called a path. It consists of a series of directories chained together in a hierarchy. At the top is / which is the root of the unix filesystem. Then comes home/ which is where user home directories are located and finally jcXXXX/ which is your personal home directory.
Use the cd command to move to the root directory of the computer
cd /
Now use ls to have a look around? Can you see the directory called home?
ls
Without changing directory try listing the contents of home/
ls home/
Try listing the contents of other directories
ls bin
ls etc
Now change directory into home
cd home
Now try running the pwd command and the ls command (without arguments). Do the results make sense? Remember that you have just moved your current home directory and when ls is run without arguments is lists files in the current working directory.
Finally navigate all the way back to your home directory (substitute your own username with jcXXXX) in the command below.
cd jcXXXXX
Run the pwd command to check that it worked
pwd
If you ever find yourself lost in the unix hierarchy you can always navigate back to your home directory using one of these three shortcuts (they all work)
cd ~
This works because ~ is a shortcut for your home directory. Another way to navigate back home is to use the cd command without an argument.
cd
Behaviour of BASH in RMarkdown vs the RStudio Terminal
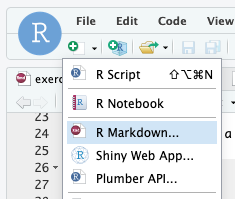
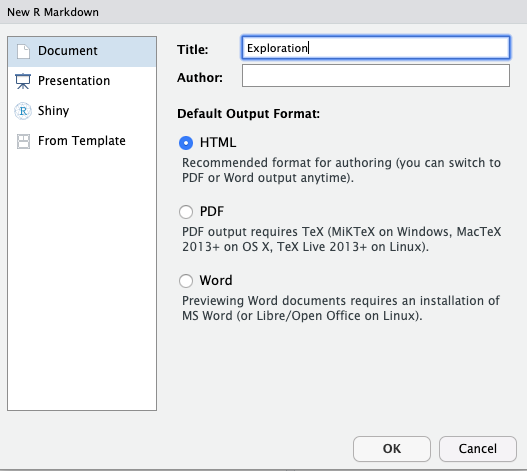
To run these commands you will need to create a bash code block in RMarkdown. Since this is just for learning (not assessment) you might want to create a separate RMarkdown document to do it. Create a new RMarkdown document called exploration.Rmd. To do this press the + button in RStudio and select R Markdown as the document type. Then select html as the output type. This will create a new document called unititled 1 with some placeholder text. Delete all the placeholder text except for the very top section of the document. This top section which is enclosed in lines containing, --- is important for RMarkdown to function correctly. It tells RMarkdown how to format the document.
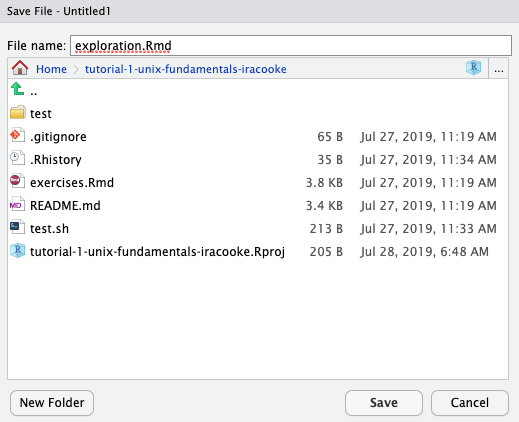
Finally save the document as exploration.Rmd
Important This document is entirely for your own use. Do not submit it for assessment. Nothing you put in this document will count towards assessment.
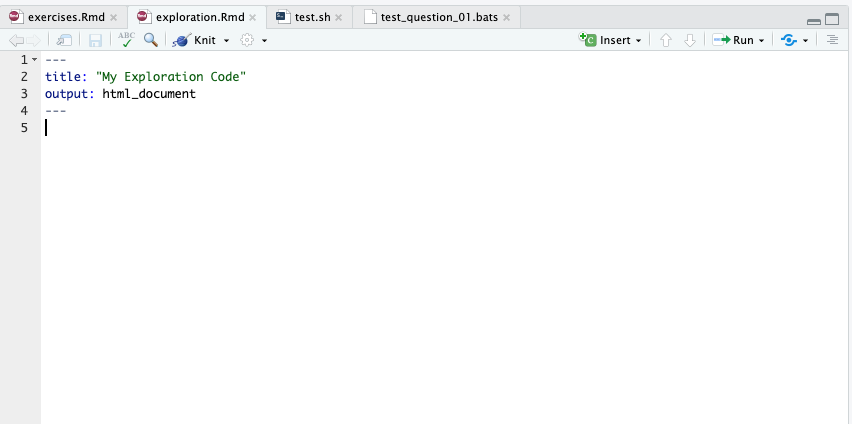
Now that you have a new RMarkdown document for exploration purposes create a new bash code block. See the image below for an example;

Now try the following using RMarkdown. Enter this code into your bash code block and run it.
cd /
pwd
And compare the results with
cd /
pwd
Your results should be different. This highlights the fact that there is no persistence between code blocks in RMarkdown.
For contrast try the same exercise cutting and pasting commands in the Terminal window. In this case you should see that actions such as cd have a persistent effect (at least within the same session).
Now try the following in Terminal
cd ~
ls ../
ls ../..
What do you think the ../ notation means?
Stop: Answer Questions 1 to 3 in the exercises
Command Paths
Before doing the next section you should update your PATH environment variable to allow access to the fortune command. Enter the following in a Terminal window.
export PATH=${PATH}:/usr/games
Enter the following command in your terminal window
fortune
Play around with the command by entering it a few times.
The fortune command, like all unix commands is a program that you invoke by typing its name. To demystify this a little it may help to know that a computer program is a set of instructions (usually only readable by the computer, not humans) that is kept in a file. Not all files contain programs but those that do can be located using the which command.
Find out where the program for the fortune command is by entering the following
which fortune
All the other unix commands are also just programs that exist as files somewhere on the system. Try using the which command to find out the location of various common commands like ls, mv, mkdir, man
Stop: Answer Question 4 in the exercises
Making directories
The command to create directories is called mkdir. Use the Terminal to try the following commands
mkdir dirdemo
After doing this refresh your file browser in RStudio. Can you see the dirdemo directory?
Now what happens if we try to create it again
mkdir dirdemo
It gives an error because the directory already exists. If we wanted to use mkdir and make sure no error was thrown even if the directory already existed we could use the option -p which tells mkdir not to worry about existing directories. Try it now
mkdir -p dirdemo
The -p option can also be used to create several directories in one go.
First let’s get rid of the dirdemo directory. This can be done on the command-line but to keep things safe (avoid accidental deletion) I recommend that you delete the dirdemo directory using the file browser in RStudio. You can do this by selecting it and clicking Delete.
Go ahead and delete dirdemo. Now try the following
mkdir -p dirdemo/dir_a
mkdir -p dirdemo/dir_b
Have a look at the directories that were created. Do this using the RStudio file browser and (for practice) using ls in Terminal.
Delete the dirdemo directory again. This time let’s try creating everything in one go. We can do this because mkdir will accept multiple paths and will create all directories in all the paths we give it.
mkdir -p dirdemo/dir_a dirdemo/dir_b
Stop: Answer Questions 5 and 6 in the exercises
Shell glob patterns
One of the most powerful features of unix is its ability to operate on many items in an automated fashion. An important part of this is a feature called glob patterns. These are used to refer to several files at once. This tutorial comes with some small files as example data that will allow us to explore shell globs
Inspect the example data using the ls command
ls data
Notice that almost all of the files end with the extension .fasta. These are sequence data files. There is also a single file that ends with .txt.
We can use a glob pattern to list only .fasta or .txt files like this
ls data/*.fasta
ls data/*.txt
This demonstrates the most commonly used wildcard character, * which matches anything. It is very versatile. For example we could list only files starting with G and ending with .fasta
ls data/G*.fasta
What if we wanted to match all files starting with either a G or a T? This isn’t possible using * but it can be accomplished square brackets. In this case we put any of the possible characters to be matched within square brackets like this;
ls data/[GT]*.fasta
Stop: Answer Question 7 in the exercises
Copying files
The cp command is used to copy files in unix. Let’s try copying a file from the data directory into a new directory called dirdemo
First create the dirdemo directory with mkdir
mkdir -p dirdemo
Now copy a file from data
cp data/Baboon_AA.fasta dirdemo/
Make sure it worked using ls
ls dirdemo/
Now try using a shell glob to copy multiple files at once.
cp data/*.fasta dirdemo/
Stop: Answer Question 8 in the exercises
Printing the contents of files
So far we have used the RStudio file browser to inspect files. There are also command line tools for doing this and they are often more convenient to use when manipulating large numbers of files as we will do later in this subject
The main commands for inspecting the contents of files in unix are
| Command | What it does |
|---|---|
cat |
Show the entire contents of a file |
head |
Show only the top few lines of a file |
tail |
Show only the last few lines of a file |
less |
Open the file for interactive reading |
Note that all of these except less are useful as part of automated pipelines. less requires input from the user. Don’t use programs like less as part of RMarkdown documents because they will block compilation of the document (the document will hang, waiting for user input forever).
Example Data
This tutorial comes with some example protein and nucleotide sequence data.
All example data is inside a folder called data in this project. Use the RStudio file browser to find this folder and look inside it to see its contents. Click on one or two of the individual files (eg Baboon_AA.fasta) to see their contents. Files labelled _AA.fasta are amino acid (protein) sequences whereas files labelled _NA.fasta are equivalent nucleotide sequences.
Try out the cat command by entering the following in Terminal
cat data/Baboon_AA.fasta
It should print the entire contents of the file Baboon_AA.fasta
Like most unix utilities cat also works with multiple files. We can provide these directly like this
cat data/Baboon_AA.fasta data/Baboon_NA.fasta
Or using a shell glob
cat data/Baboon_*.fasta
Redirecting output
Unix programs can write their outputs to a range of places including;
- To a normal file
- To standard output. Also known as
stdout - To standard error. Also known as
stderr
Remember the fortune command from above. When you run it the output is written to stdout. The default behaviour of the shell is to print stdout to the screen. This behaviour can be changed using the output redirection operator >. In this case we will use > to redirect stdout to a file instead of allowing it to be printed to the screen. This is extremely useful as it allows outputs to be captured for later processing.
Try the following example
mkdir -p dirdemo/fortunes
fortune > dirdemo/fortunes/f1.txt
## Error in running command bash
Note that when we run this nothing is printed to the screen. Inspect the contents of the file dirdemo/fortunes/f1.txt. It should contain at least one fortune statements.
Try running the code above several times and inspect what happens to f1.txt. You should see that the contents are replaced every time. This should serve as a note of caution about the > operator. It is potentially destructive since it will overwrite existing data.
Counting characters with wc
wc (Word Count) is a simple but remarkably useful unix command. It counts words, lines and characters in text.
Try it out with the files you generated using the fortune command
wc dirdemo/fortunes/f1.txt
It should produce three numbers (and a filename) as output. The three numbers are (in order) the number of lines, words and characters in the file
Now look at the help page for wc. (Enter this in Terminal. Don’t run from RMarkdown)
man wc
The help page describes the general usage of the command and also lists various options for changing the default behaviour.
Try the -l option which limits output to just the number of lines
wc -l dirdemo/fortunes/f1.txt
Joining commands together with the pipe | operator
The unix system consists of many small programs, each of which tends to do just one task. The true power of unix comes from the ease with which multiple commands can be combined together to accomplish larger and more complex tasks.
The pipe operator, | divides two commands, one on the left and one on the right. When a pipe is present it takes the output of the command on the left and feeds it into the command on the right as input.
Here’s an example using the cat and wc commands;
cat dirdemo/fortunes/f1.txt | wc -l
Notice that this time no filename is printed. This is because wc isn’t operating on a file in this context. It is operating on a stream of text coming from the output of cat.
Try another example
fortune | wc
And here is a more amusing example.
fortune | cowsay
And here is an example that chains three commands together. (Requires colours so it works in Terminal, not from RMarkdown)
fortune | cowsay -f dragon | lolcat
Stop: Answer Questions 9 and 10 in the exercises